

How to Repair a Broken Ornate Mirror Frame With Polymer Clay for Under $30
Turn a $15 thrift find into a $300 lookalike with oven-bake clay and spray paint
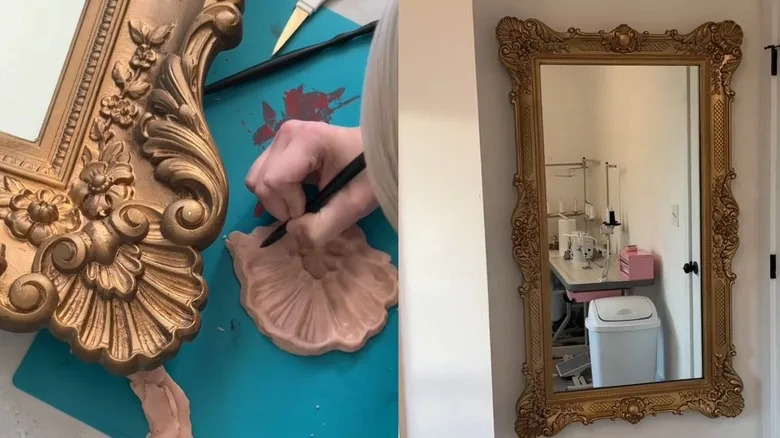
A cracked corner on a vintage mirror frame doesn’t mean the piece belongs in the dumpster. With a $12 block of polymer clay and basic sculpting tools, DIYers are restoring thrifted mirrors that retail for $300-plus at stores like World Market and Anthropologie.
The technique, documented by maker Paige Sechrist, turns a damaged find into a custom piece in an afternoon. The repair works on wood, plaster, composition, and resin frames — essentially any rigid surface that adhesive can grip.
Start by identifying your frame material. Wood frames take wood glue; plaster, resin, and metal need a flexible epoxy like E6000 or a two-part marine adhesive. Test a hidden spot first: some vintage finishes react to solvents in strong glues.


Clean the entire frame with a dry microfiber cloth, then hit crevices with a soft brush. For the mirror glass, a 1:1 mix of distilled white vinegar and filtered water cuts grime without streaking. Let everything dry completely — moisture trapped under clay creates mold risk later.
Condition the clay by kneading until pliable. Roll a slab roughly 1/4-inch thick on a clean surface. Press the slab firmly onto an intact corner of the same frame, capturing the ornamentation in reverse. Use a ball stylus to deepen shallow impressions and a needle tool to recreate fine lines the clay missed. Work in sections if the pattern is complex.
Bake according to package directions — typically 275°F for 15 minutes per 1/4 inch of thickness. Air-dry clay skips the oven but shrinks 5-10% as it cures; factor that into your impression. Once cooled, dry-fit the piece. Sand edges with 220-grit paper or a rotary tool until the seam disappears.
Color matching is where most repairs fail. Don’t guess. Take the frame to an auto-parts store or Sherwin-Williams and have them color-match a chip in spray enamel. Matte, satin, and metallic finishes require different base coats. For gold or silver leaf looks, apply a tinted primer first — red oxide under gold, gray under silver — then use rub-n-buff wax or liquid leaf for the final layer.
Mask the glass with painter’s tape and newspaper before spraying. Light coats, 15 minutes apart, prevent runs. Two coats of clear matte polyurethane protect the finish from humidity and cleaning overspray.
Total material cost: polymer clay ($12), basic tool set ($15), adhesive ($7), spray paint ($10), clear coat ($8). Most tools are reusable. The repaired corner withstands normal handling but avoid hanging the mirror where vibration or temperature swings stress the bond.
If the frame has multiple breaks, mold each missing section separately. Trying to sculpt one large piece risks distortion during baking. For frames with repeating patterns, one good impression serves as a master — press fresh clay into the baked piece to duplicate the design.
Sechrist’s latest tutorial adds a reinforcement step: embedding a thin wire loop into the clay before baking, then anchoring it to the frame with a micro-screw. She reports zero failures after 18 months on pieces hung in high-traffic entryways.